Sunday, June 29, 2014

Glowy Bridal Makeup

This beautiful woman is Nicole. She is our awesome office manager at SpaRenity and she so graciously agreed to be my model for the afternoon! Since we are in wedding season, I figured a glowy, glamorous look would be appropriate :)
All products used will be listed below!  

Here is Nicole before...

And then we decided it would be fun to have a little photo shoot ;)
Although she's not actually engaged, she will make a GORGEOUS bride one day!

F A C E : Jane Iredale Smooth Affair Primer
JI Dream Tint Tinted Moisturizer
JI Amazing Base in Warm Sienna
JI So Bronze-3
JI Blush in Dubonnet

E Y E S : Shadows; Lorac Pro Palette
Salon Perfect Lashes in Demi Whispies

L I P S : Jordana Lip Liner in Tawny
NYX lip gloss in Tiramisu


One of my favorites!


Saturday, June 14, 2014

Affordable & Colorful Makeup Pictorial!


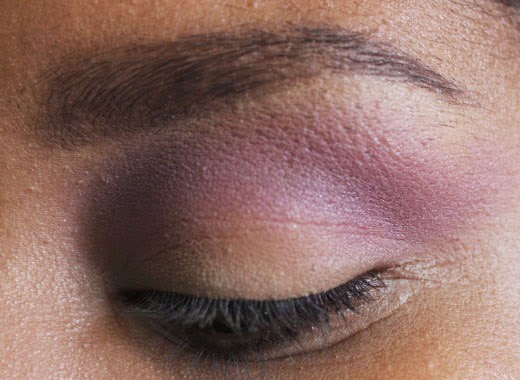
Here is the look I created using this $3 e.l.f. palette! It's super easy to do! Let's get started shall we? ;)


I purchased this a while back at Target not really knowing how I wanted to use these shadows. Purple looks AWESOME with brown eyes, so don't be afraid to play around with color! It's not scary, as long as it is applied correctly. The key to any colorful smokey eye is blending!


Step 1: Make sure your eye is primed and ready for shadow! Today I used e.l.f.'s eyelid primer. It's very affordable and works great. I also put just a dab of concealer over my lids to correct any discoloration.


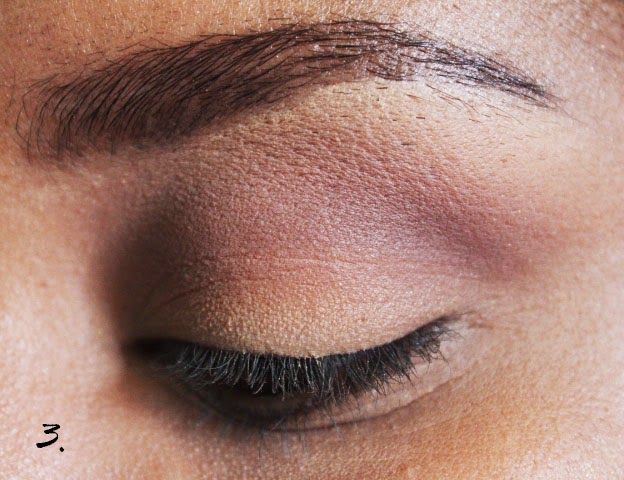
Step 2: Apply a shadow that's close to your skin tone just above the crease. This will help the other shadows blend seamlessly together.


Step 3: I took a really fluffy blending brush and applied the 2nd eye shadow in the palette kind of messily to the crease and part of the eye lid. Slowly build up the intensity of the color to your liking. I also brought each shadow that I used a little past the edge of my eye, creating a subtle cat-eye effect.


Step 4: Take a more precise crease brush and take the "crease" color of the palette and apply it directly to he crease. How many more times can I say crease? ;)
You also want to extend this shadow past the edge of the eye creating that wing.


Step 5: Now just repeat step 4, but using the darkest shade in the palette. This look is all about that smokey, gradient affect! Keep on blending in between colors and you'll be good to go!


Step 6: After working with all those dark shades, it's time to add some highlight. I applied the lightest shade in the palette to my lid, inner corner, and brow bone! Be sure to blend ;)


Step 7: I applied the darker purple to the lower lash line, added a gel winged liner, mascara, and lashes of course! 

Here's the finished look! 
Thanks for stopping by. Let me know what you'd like to see next! 


Monday, June 9, 2014

Skin Care Routine


I have tried A LOT of skin care products. Most from the drugstore, which might I add, are NOT good for your skin. I was introduced to Dermalogica quite a while ago by a fellow esthetician and my wonderful boss Nancy! It is a bit pricy, but it's absolutely worth every cent!

Step 1: I first cleanse the skin with Dermalogica's Special Cleansing Gel. This cleanser is great for all skin types! It help to remove skin impurities without disrupting the natural moisture balance.


Step 2: Next I exfoliate with Dermalogica's Daily Microfoliant! How often you exfoliate really depends on your skin type and sensitivity. For myself, I exfoliate a few times a week after cleansing. This Unique Rice-based powder formula activates upon contact with water, releasing Papain, Salicylic Acid and Rice Enzymes that micro-exfoliate dead cells, instantly leaving skin smoother and brighter. It works well with all skin types.


Step 3: After cleansing and exfoliating it's important to return the skin to its normal pH balance for proper absorption of moisturizer. I lightly spritz Dermalogica's Multi-Active Toner few inches from the face.


 Step 4: This is something I don't do every single day but applying a mask once a week is great for an extra boost in hydration! Dermalogica has a variety of mask's to choose from according to your skin type.


Step 5: Last, but certainly not least, is moisturizer. VERY important. Since I do have an oily t-zone, it's super important to keep the skin hydrated. Not moisturizing can lead to the skin trying to hydrate itself, aka - OIL! Not fun! I will either mix the Solar Defense Booster with Active Moist or with the Oil Control Lotion.

Thanks for stopping by! If you have any questions or comments, please feel free to leave them down below. 
Thanks for stopping by! :)


Wednesday, June 4, 2014

My Favorite Drugstore Products

If you're like me, then you probably don't have the budget to spend loads of money on high-end makeup! So here are a few of my favs from the drugstore! You can find these products listed below at any Walmart, Target, Ulta, or Walgreens.


Maybelline Fit Me Foundation - I'm not a huge fan of the way my skin feels with foundation on. But I do have to say, this give great coverage and lets my skin breath beautifully!
It retails for $5.99

Maybelline Instant Age Rewind Eraser Dark Circle Treatment - This is a great under eye concealer as it conceals dark circles AND brightens. I've also used this to highlight the rest of my face. It has a matte finish and sets perfectly under powder.

It retails for $8.99

Rimmel Stay Matte Pressed Powder - Make sure to set all liquid products with a setting powder! This one works just as well as any high-end powder I've ever used...and the best part? It minimizes the look of pores which is a huge plus for us oily-skin girls!
It retails for $6.99

e.l.f Studio Eyebrow Kit - Brows are errrthang! Well to me, anyways! This kit is 3 bucks. Did ya get that? THREE DOLLARS! Most days I choose this over my high-end brow powder. It has a gel side, to define and shape the brows, and it also has a powder side to fill in the rest of the brow for a natural look.
It retails for $3.00

Wet n Wild Eyeshadows - I have to say that I'm pretty picky when it comes to eyes shadows. This is one of the best drugstore brand eyeshadows I've used! It has nice color pay off and blends fairly easily. You can't beat that price! I give it two thumbs up ;)
It retails for $2.99

CoverGirl Lashblast Volume Mascara - I've tried lots of mascara's from the drugstore and this is by far my favorite! It also comes in a waterproof formula which is great for summer time!
It retails for $8.79

Milani Baked Blush - These baked blushes shape, contour, and highlight the face. It gives a really gorgeous glow to the skin!
It retails for $8.49

NYX Matte Bronzer - This is great for contouring and overall bronzing. It has great pigmentation and looks natural on the skin!
It retails at Ulta for $8.99

Wet n Wild Megalast Lipstick - These glide on soooo smoothly with a rich, velvety color! They claim to last about 4 hours. From personal experience I'd say that's about right even while eating and drinking.
It retails for $1.99

Thanks for stopping by! Stay tuned for a few before & afters!


Sunday, June 1, 2014

Urban Decay Naked 3 Pictorial!


This is one of my favorite looks to create with the Naked 3 Palettes! I find it simple and effortless. Feel free to tweak the shadows according to your preference and skin tone.

Here is a quick step-by-step pictorial. Details will be listed below!

Step 1 - Prime the eyelid. I used Too Faced Shadow Insurance, but any primer will do! I then concealed any darkness and veins on my eyelid by applying concealer.

Step 2 - Take a fluffy blending brush and blended Limit right above the crease.

Step 3 - Take a smaller blending brush and apply Nooner directly in the crease. 

Step 4 - Taking a smaller brush, apply Darkside and Blackheart to the outer "V" of the eye and slightly into the crease. Take a blending brush and blend blend blend so there are no harsh edges!


Step 5 - Apply Trick to to the lid. I'm pretty sure this eyeshadow is accurately named, because it is a little tricky. To get the color pay off I wanted I used my fingertip instead of an eyeshadow brush. You could also spray your brush with a setting spray before hand to make the color more intense.


Here is the finished look!
I added a winged gel liner, mascara, lashes, and a nude liner to the waterline.


Thanks for stopping by!